


Beauty lover! Let’s talk about something that’s probably sitting in your makeup bag right now—or should be. Sponge makeup. Yeah, that little squishy tool you’ve seen all over TikTok and Instagram? It’s not just a trend—it’s a total game-changer for anyone who wants that effortless, airbrushed look without spending hours in front of the mirror. Imagine this: you’re running late (again), but your foundation still looks like a pro did it. That’s the magic of sponge makeup.
Did you know that makeup sponges have been around since the 1950s, when Hollywood makeup artists swore by them for that flawless finish? Fast forward to today, and they’re still stealing the show—because they work. Whether you’re a newbie dipping your toes into the beauty world or a seasoned pro chasing that perfect blend, sponge makeup is your ride-or-die. So, grab a coffee (or a wine, no judgment), and let’s dive into why this little tool deserves a prime spot in your routine—and where to snag the best ones. Spoiler: I’ve got links to Amazon.com, Amazon.co.uk, and Amazon.ca ready for you!
Why Sponge Makeup Is the MVP of Your Beauty Routine
Let’s be real—there’s something so satisfying about dabbing on your foundation with a sponge, watching those streaks and patches just… disappear. Brushes are great, sure, but sponges? They’re next-level. Here’s why sponge makeup is the essential you didn’t know you needed until now.
The Basics—What Is Sponge Makeup, Anyway?
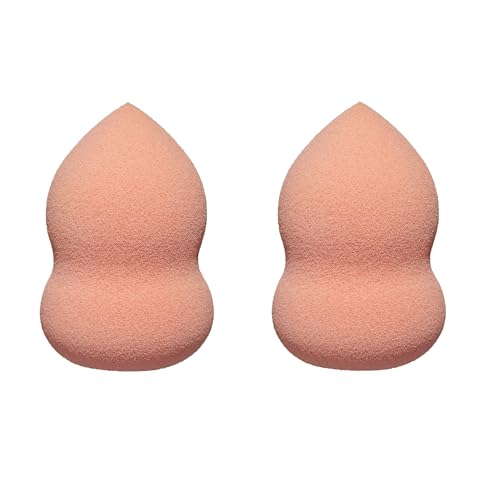
Okay, quick rundown: sponge makeup refers to those soft, bouncy applicators you use to slap on foundation, concealer, blush—pretty much anything that needs to blend like a dream. They come in all shapes—teardrops, wedges, even quirky little eggs—but the goal’s the same: smooth, even coverage that looks like you, but better.
Unlike brushes that can leave bristles behind (ugh) or fingers that just smear stuff around, sponges soak up the perfect amount of product and press it into your skin. Think of it like a mini facial massage with a flawless finish as the bonus. And the best part? They’re stupidly easy to use. No fancy skills required.
Why You’ll Ditch Your Brush for a Sponge
I’m not here to start a brush vs. sponge war, but hear me out—sponges have some serious perks. Here’s the scoop:
- Flawless Finish, Every Time: Sponges blend like nobody’s business. No streaks, no caking—just that soft, natural glow you’re chasing.
- Buildable Coverage: Want light and dewy? One dab. Full glam? Layer it up. You’re in control.
- No Waste Zone: They don’t hog product like brushes can. More bang for your makeup buck.
- Beginner-Friendly Vibes: If you’re intimidated by contouring brushes or stippling techniques, sponges are your chill BFF.
I remember the first time I swapped my crusty old brush for a sponge—it was like night and day. My foundation didn’t just sit there; it melted into my skin. Game. Changer.
The Science Behind the Sponge Magic
Okay, let’s geek out for a sec—there’s a reason sponges work so well. It’s all about their porous texture. When you dampen them (pro tip: always dampen!), they swell up, creating tiny pockets that grab just enough product and press it evenly into your skin. Dry sponges? They’re greedy—they’ll soak up too much and leave you patchy. Wet sponges? Perfection. It’s like the Goldilocks of makeup tools—just right.
Plus, the bouncing motion (you know, that tap-tap-tap) pushes product into your pores instead of sitting on top. That’s why you get that airbrushed look without a filter. Cool, right?
Picking the Perfect Sponge Makeup Tool for You
Not all sponges are created equal, fam. With so many options out there, how do you know which one’s worth your coin? Let’s break it down.
Shapes That Slay
- Teardrop: The OG. Pointy end for under eyes and nose, fat end for cheeks and forehead. Total multitasker.
- Wedge: Flat edges for contouring, corners for precision. Great if you’re into sharp cheekbones.
- Egg-Shaped: Think Beautyblender vibes. Curvy and bouncy for all-over coverage.
- Flat-Top: Perfect for pressing in powder or cream blush. Less common but a hidden gem.
Pro tip: If you’re a newbie, start with a teardrop—it’s foolproof. I’ve got some killer picks linked below, so keep scrolling!
Material Matters
Most sponges are made from latex-free foam (bye, allergies!), but some brands mix in fancy stuff like antimicrobial coatings or memory foam. The big names—like Beautyblender or Real Techniques—use high-quality, bouncy materials that last longer and feel luxe. Cheap ones? They’ll crumble faster than a stale cookie. Trust me, I’ve been there.
Top Sponge Makeup Picks to Shop Now
Alright, let’s get to the good stuff—where to buy these babies. I’ve scouted the best sponge makeup tools on Amazon.com, Amazon.co.uk, and Amazon.ca so you can click and glam up ASAP. These are my faves after testing way too many (my bathroom looks like a sponge graveyard):
Beautyblender Original
- Why I Love It: The queen of sponges. Soft, bouncy, blends like a dream.
- Price: Around $20, but worth every penny.


Real Techniques Miracle Complexion Sponge
- Why I Love It: Affordable and versatile. That flat edge? Chef’s kiss for contour.
- Price: Under $10. Steal!


EcoTools Perfecting Blender Duo
- Why I Love It: Two sponges, eco-friendly vibes, and a killer price.
- Price: Around $12 for the pair.


Snag one (or all three—no one’s judging) and thank me later. Your selfies are about to level up.
How to Use Sponge Makeup Like a Pro
So, you’ve got your shiny new sponge. Now what? Don’t worry—I’ve got your back with a step-by-step that’s so easy, you’ll be blending like a YouTube guru in no time.
Step 1—Prep That Sponge
First things first: wet it. Run your sponge under the tap until it’s soaked, then squeeze out the excess. It should feel damp, not dripping. This keeps it from drinking up all your foundation and gives you that dewy finish. Dry sponges are a no-go—they’ll leave you streaky and sad.
Step 2—Load It Up
Dot your foundation, concealer, or whatever you’re using onto your face first—cheeks, forehead, chin. Then, grab your sponge and start dabbing. Don’t swipe or drag; bounce it gently. The tapping motion is key—it blends without smearing.
Step 3—Build and Blend
Light coverage? One layer’s fine. Going full glam? Add more product and keep bouncing. Use the pointy end for tricky spots like under your eyes or around your nose. Got cream blush or highlighter? Same deal—dab it on, blend it out.
Step 4—Set It and Forget It
Finish with a light dusting of powder if you’re oily (dry-skin folks can skip this). Boom—you’re done. Flawless face in under five minutes.
Want a visual? Picture this: me, half-asleep, spilling coffee on my shirt while blending with a sponge. Still looked bomb. That’s the power of this tool.
Sponge Makeup Hacks You’ll Wish You Knew Sooner
Alright, let’s level up. These tricks will take your sponge game from good to whoa.
- Bake Like a Boss: Dampen your sponge, dip it in loose powder, and press it under your eyes to set your concealer. Wait a few minutes, dust off—hello, bright eyes.
- Nail That Dewy Look: Mix a drop of facial oil with your foundation on the sponge. Glow city, population: you.
- Clean Up Mistakes: Dry sponge corner = instant eraser for smudged eyeliner or lipstick. Lifesaver.
I once used a sponge to fix a mascara blob mid-date. Worked like a charm—no one noticed. Well, except me, smirking into my wine glass.
Caring for Your Sponge Makeup BFF
Listen, your sponge works hard. Give it some love back so it doesn’t turn into a germy mess.
Cleaning 101
Wash it after every use if you can—warm water, a drop of gentle soap (baby shampoo’s my go-to), and a good squeeze until the water runs clear. Let it air dry. Done. Takes two minutes, saves you from breakouts.
When to Toss It
Sponges aren’t forever. If it’s ripping, staining weird, or smells funky even after washing—time to say goodbye. Most last 1-3 months, depending on how much you use ‘em.
Sponge Makeup vs. The World—How It Stacks Up
Still on the fence? Let’s pit sponge makeup against the competition.
- Sponge vs. Brush: Brushes are precise but can streak. Sponges blend better, hands down.
- Sponge vs. Fingers: Fingers are free but messy. Sponges give you control and a pro finish.
- Sponge vs. Airbrush: Airbrush is fancy (and pricey). Sponges get you 90% there for a fraction of the cost.
For my money—and my face—sponges win every time.
Conclusion: Your Glam Journey Starts Here
So, there you have it—sponge makeup is the effortless glam essential you’ve been sleeping on. It’s quick, it’s easy, and it makes you look like you’ve got your life together (even if you don’t). From picking the right shape to mastering that bounce-blend technique, you’re now armed with everything you need to slay your makeup game.
Trust me, your mirror’s about to become your new happy place. Got a fave sponge or a killer tip? Drop it in the comments—I’m all ears!
