


Beauty lovers! Ever wondered how to get that flawless, airbrushed look without spending hours in front of the mirror? Or maybe you’re just fed up with foundation that looks patchy or cakey by lunchtime. Well, I’ve got a little secret weapon for you: foundation sponge liquid makeup. Yep, that bouncy, egg-shaped wonder can totally transform your routine, giving you an even, glowing finish faster than you can say “where’s my coffee?” I’ve spent way too many mornings testing sponges and techniques—some flops, some fabulous—and trust me, once you nail this, your skin will thank you. Ready to dive into the glow-up of your dreams? Let’s get started!
Why Use a Sponge for Liquid Foundation?
So, let’s kick things off with the big question: why bother with a sponge when you’ve got brushes or fingers? Honestly, I was skeptical too. I mean, my old brush worked fine, right? But then I tried a sponge, and oh boy, it was like a lightbulb moment. Here’s why foundation sponge liquid makeup is a total game-changer:
- Seamless Blending: Sponges don’t leave streaks like brushes can. Instead, they blend your foundation into your skin like it’s meant to be there.
- Natural Glow: They give you that “I woke up like this” vibe—smooth, radiant, and never heavy.
- Buildable Coverage: Need a little extra under your eyes? No problem. Sponges let you layer without turning into a cake-face disaster.
- Less Waste: Brushes soak up product like a sponge (ironic, huh?), but a damp sponge keeps more foundation on your face where it belongs.
- Multi-Tasking Magic: Beyond foundation, use it for concealer, cream blush—heck, even contour if you’re feeling fancy.
Now, there’s a bit of science to back this up too. When you dampen a sponge (more on that later), it creates this cool barrier between your skin and the makeup. The result? Less product gets absorbed into your pores, and you end up with a smoother, more even finish. Plus, that bouncy motion presses everything in place for all-day wear.
Fun tidbit: makeup sponges started as basic latex wedges back in the day, used by Hollywood pros for quick, flawless applications. Fast forward to 2003, when Rea Ann Silva dropped the Beautyblender, and suddenly, sponges were everywhere. Crazy how a little tool can rewrite the beauty rulebook, right?
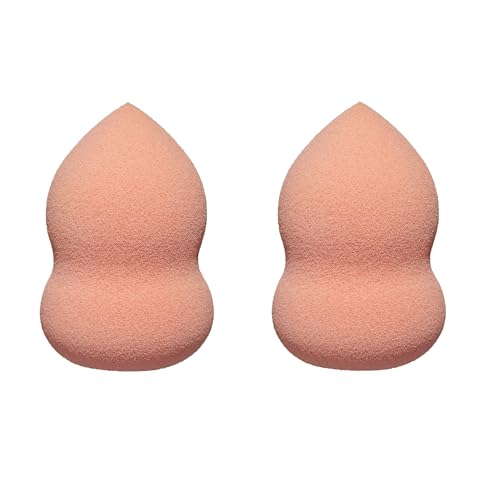
Choosing the Right Sponge
Okay, so you’re sold on foundation sponge liquid makeup, but here’s the catch—not all sponges are created equal. Walk into any store (or scroll Amazon), and you’ll see a million options. How do you pick? Let’s break it down:
What to Look For
- Material: Most sponges are latex-free foam—perfect if your skin’s sensitive like mine gets sometimes. Silicone sponges are another vibe; they don’t soak up anything, but blending takes some practice.
- Shape: The classic egg shape rules for a reason—rounded for big areas, pointed for precision. Flat sponges press product in tight, while angled ones are contouring champs.
- Size: Full-size for foundation, minis for concealer or tricky spots like around your nose.
- Density: Softer sponges = sheer coverage; denser ones = more oomph.
Popular Picks
- Beautyblender Original: The OG. It’s soft, bouncy, and blends like a dream.
- Real Techniques Miracle Complexion Sponge: Budget-friendly with a flat edge for extra control.
- EcoTools Perfecting Blender Duo: Eco-conscious and dual-sized for versatility.
- Silicone Sponges: Zero waste, but you’ll need to tweak your technique.
Here’s a pro tip: match your sponge to your skin type. Oily folks might love a denser sponge to keep shine in check. Dry skin? Go softer to avoid flaking. And always—always—wet your sponge first. It’s a game-changer for blending and saving product.
Application Techniques for an Even Glow
Got your sponge? Awesome. Now, let’s talk about how to use it. Trust me, there’s a knack to this, but once you get it, you’ll wonder how you ever survived without foundation sponge liquid makeup. Here’s your step-by-step glow guide:
- Prep Your Skin: Cleanse, moisturize, prime—basic stuff, but it sets the stage.
- Dampen the Sponge: Run it under water, squeeze out the excess. Damp, not dripping.
- Apply Foundation: Dot liquid foundation on your face—forehead, cheeks, nose, chin. Or dab it on your hand and pick it up with the sponge.
- Blend Like a Pro: Use the rounded end and bounce—not drag—outward from the center. Think mini trampoline vibes (kidding, but it works!).
- Hit the Small Spots: Under eyes, around your nose? Flip to the pointed end for precision.
- Build If Needed: More coverage? Add thin layers and blend again.
- Lock It In: Finish with setting spray or powder for that all-day glow.
The bouncing trick is key. Dragging just smears everything around—yuck. Bouncing presses the foundation in for that flawless, airbrushed look.
Want a natural vibe? Keep it light and sheer. Going full glam? Build it up with a denser sponge. Oh, and never—ever—use it dry. Dry sponges suck up product and leave you streaky. Learned that the hard way once—total rookie move!
Need a visual? Picture this: a step-by-step photo guide showing each move. Or better yet, watch a quick YouTube tutorial (#) to see it in action.
Best Practices for Fast Application
We’ve all had those mornings—alarm didn’t go off, coffee’s cold, and you’ve got 10 minutes to look human. Good news: foundation sponge liquid makeup can save the day. Here’s how to speed things up:
- Prep Ahead: Dampen a few sponges the night before and stash them in a clean container. Grab and go!
- Multi-Task: Use the same sponge for foundation, concealer, even cream blush. Less switching, more glowing.
- Quick-Dry Formulas: Pick foundations that set fast—no waiting around.
- Spray and Blend: Spritz setting spray post-foundation, then blend again. It locks in faster.
- Practice: The more you do it, the quicker you’ll get. Time yourself—it’s weirdly satisfying.
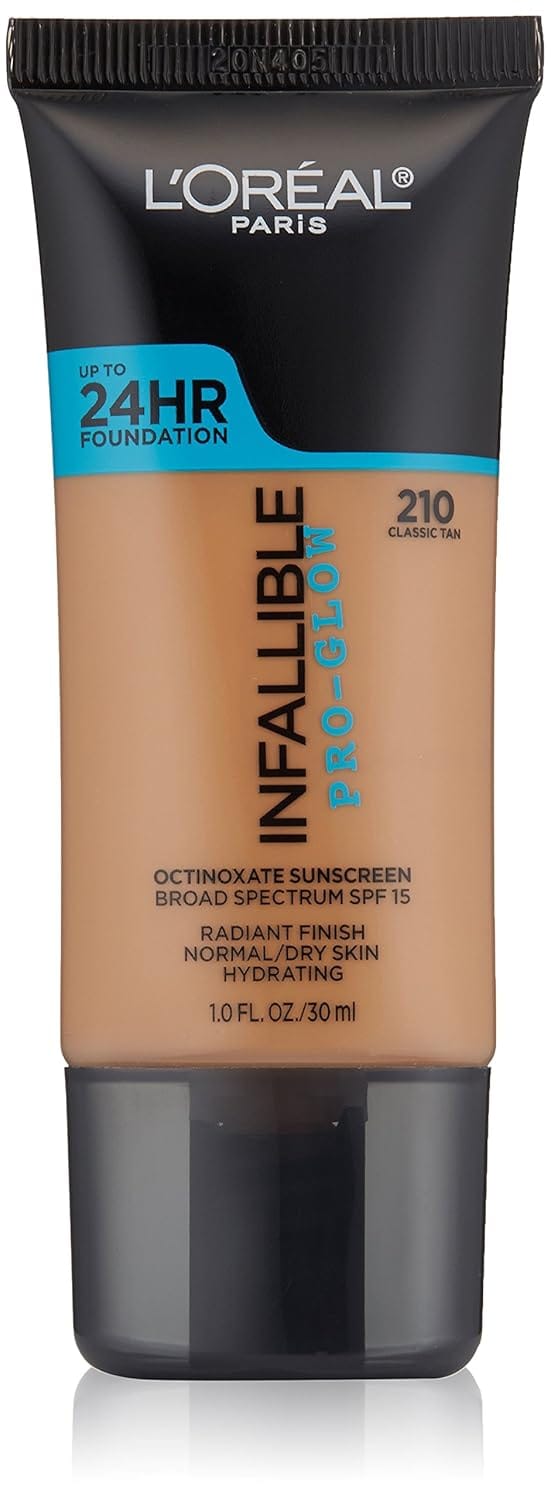
One hack I love? Pair your sponge with a foundation like L’Oreal’s Infallible Pro-Glow. It’s lightweight, blends like butter, and dries quick—perfect for chaos mornings. Your face will look polished before your toast pops up.
Product Recommendations
Alright, let’s shop! I’ve rounded up some top-rated sponges and liquid foundations that play nice with foundation sponge liquid makeup.
Top Sponges
Beautyblender Original: The gold standard. Soft, bouncy, flawless finish every time.


Real Techniques Miracle Complexion Sponge: Affordable with a flat edge for precision. A steal!


EcoTools Perfecting Blender Duo: Two eco-friendly sizes for all your needs.


Best Liquid Foundations
L’Oreal Paris Infallible Pro-Glow: Long-lasting glow that blends like a dream.


Maybelline Fit Me Dewy + Smooth: Hydrating and perfect for dry skin with a sponge.


Fenty Beauty Pro Filt’r Soft Matte: Matte lovers, this one’s for you—pairs great with a dense sponge.


Check out reviews from other beauty buffs on Amazon. Seriously, why guess when you can know? Click those links and snag your faves—your glow-up’s waiting!
Keep It Clean: Sponge Maintenance Tips
Quick side note—your sponge isn’t a set-it-and-forget-it deal. To keep that foundation sponge liquid makeup magic alive, clean it regularly. Here’s how:
- Wet it with warm water.
- Add a gentle soap or cleanser (I love baby shampoo for this).
- Massage out the gunk—focus on stains.
- Rinse until the water’s clear.
- Squeeze and air dry.
Do this after every use if you can—bacteria’s no joke. A clean sponge means better application and happier skin. Bonus: it’ll last longer too.
Common Mistakes to Avoid
Even pros mess up sometimes (guilty!). Here’s what to dodge with foundation sponge liquid makeup:
- Skipping the Damp Step: Dry sponges = patchy disaster. Wet it, always.
- Neglecting Cleaning: Dirty sponges breed breakouts. Stay on top of it.
- Dragging Instead of Bouncing: Dragging streaks; bouncing blends. You know the drill.
- Overloading Product: Too much foundation clogs the sponge and your face. Start light.
I once rushed out with a dry sponge—looked like I’d painted my face with a roller. Never again. Learn from my oops, okay?
FAQs: Your Sponge Questions Answered
Got questions? I’ve got answers. Here’s the scoop on foundation sponge liquid makeup:
- Can I use a sponge with powder foundation? Sure, but brushes might edge it out for powders. Sponges shine with liquids.
- How often should I replace my sponge? Every 3 months, or sooner if it’s crumbling or funky-smelling.
- Wet or dry—really, what’s better? Wet, hands down. Dry’s a rookie trap.
Conclusion: Glow On, Beauty!
So, there you have it—your ultimate guide to foundation sponge liquid makeup for an even, glowing finish fast. From picking the perfect sponge to blending like a pro, you’re ready to slay your makeup game. It’s not just about looking good (though you will); it’s about feeling unstoppable in your own skin. Experiment, have fun, find your groove.
