


Beauty enthusiast! Ever caught yourself staring at a celeb’s flawless, airbrushed complexion, wondering how on earth they pull it off? Spoiler alert: it’s not just good genes or fancy lighting. One of the best-kept secrets in the makeup world is sponge blending—a game-changing technique that can transform your routine and leave your skin looking like it’s been kissed by a filter. Whether you’re a makeup newbie or a seasoned pro, this method is about to become your new best friend.
So, what’s the deal with sponge blending? It’s all about using a makeup sponge to apply and blend foundation, concealer, and other goodies for a seamless, natural finish. No streaks, no cakey messes—just smooth, even coverage that lasts. Stick with me, and I’ll walk you through everything you need to know to master this technique, pick the perfect sponge, and even snag some top-notch recommendations from Amazon. Ready to elevate your makeup game? Let’s dive in!
What is Sponge Blending?
Let’s start with the basics. Sponge blending is a makeup application trick that uses—you guessed it—a sponge to dab, press, and blend products into your skin. Think foundation, concealer, or even cream blush. The result? A flawless, airbrushed look that’s tough to achieve with brushes or fingers alone.
Why does it work so well? For one, sponges are champs at soaking up excess product, preventing that heavy, mask-like feel. Plus, they blend like a dream, smoothing out lines and giving you that polished vibe. I remember the first time I ditched my brush for a sponge—my foundation went from patchy to perfection in minutes. Trust me, once you try it, there’s no going back.
How It Stands Out from the Crowd
Unlike brushes, which can sometimes leave little streaks (ugh, the worst), or fingers, which might not spread product evenly, sponge blending offers a softer, more controlled approach. The sponge’s texture—especially when damp—mimics your skin’s natural bounce, pressing makeup in rather than swiping it around. It’s like giving your face a mini hug with every tap.
Choosing the Right Sponge
Not all sponges are created equal, my friend. Picking the right one can make or break your blending experience. Let’s break down the options so you can find your perfect match.
Types of Makeup Sponges
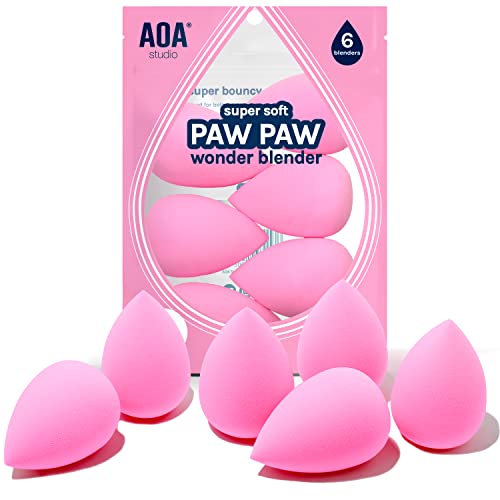
Beauty Blenders: These egg-shaped wonders are the gold standard. They’re soft, bouncy, and perfect for liquids and creams. The pointed end gets into tricky spots like under your eyes, while the rounded bottom tackles bigger areas like cheeks.


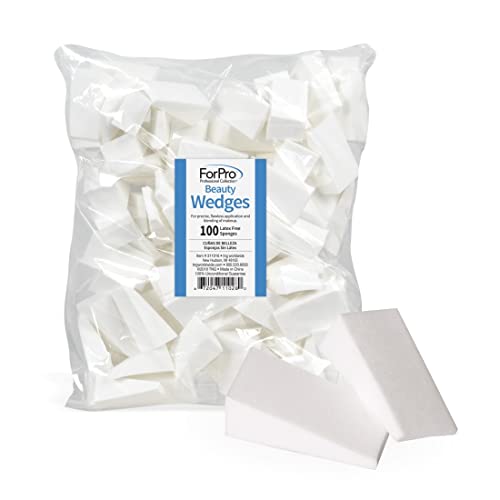
Wedge Sponges: Triangular and firm, these are your go-to for precision. Need to cover a blemish or contour your nose? Wedges have your back. They’re also super affordable—great for beginners.


Silicone Sponges: A newer kid on the block, these non-absorbent sponges waste zero product. They’re slick, easy to clean, and ideal if you hate the idea of your foundation disappearing into a sponge.


Tips for Picking Your Sponge
Choosing a sponge isn’t just about shape—it’s about your skin and style too. Got oily skin? Go for a denser sponge to control shine. Prefer a dewy, sheer look? A damp beauty blender is your best bet. And if you’re all about sustainability, look for eco-friendly options—some brands even offer biodegradable sponges now!
Pro tip: Test a few out. I once grabbed a cheap wedge sponge thinking it’d do the trick, only to find it crumbled after one use. Lesson learned—quality matters.
How to Use a Makeup Sponge for Blending
Alright, let’s get to the fun part—actually using the thing! Sponge blending is easy once you get the hang of it, and I’ve got a foolproof guide to set you up for success.
Step-by-Step Guide
- Dampen Your Sponge: Run it under water until it’s soaked, then squeeze out the excess. It should feel damp, not dripping. This step softens the sponge and helps it glide.
- Apply Product: Dot your foundation or concealer on your face—think forehead, cheeks, chin—or dab a little onto the sponge itself. Start small; you can build up later.
- Bounce, Don’t Drag: Use a stippling motion (think little bounces) to press the product into your skin. Dragging it around? That’s a no-no—it’ll streak.
- Target Tricky Areas: Flip to the pointed end for under your eyes or around your nose. The flat side works wonders on broader zones like your forehead.
- Build Coverage: Need more? Tap on extra product where you want it—like over redness or dark circles. The sponge layers beautifully without getting heavy.
Insider Tips for a Flawless Finish
- Go Light: Less product means less chance of caking. Add as you go.
- Mix It Up: Try blending cream blush or highlighter with your sponge too—it’s a total vibe.
- Practice Makes Perfect: My first attempt was a little blotchy, but by day three, I was blending like a pro. Give it time!
For a visual boost, check out this quick YouTube tutorial on sponge blending—seeing it in action really clicks. (Alt text: “Video still of a woman using a pink beauty blender to apply foundation.”)
Common Mistakes to Avoid
Even the best of us mess up sometimes. Here’s what to watch out for so your sponge blending stays on point.
- Using a Dry Sponge: Skipping the water step makes blending harder and sucks up more product. Dampen it, always.
- Overloading Product: Too much foundation at once? You’ll end up with a thick mess. Start light and layer.
- Rubbing Instead of Tapping: Dragging the sponge across your face defeats the purpose. Bounce it instead for that seamless finish.
- Skipping Cleaning: A dirty sponge is a breeding ground for bacteria—gross, right? Keep it fresh.
Fix these slip-ups, and you’ll be golden. Trust me, I learned the hard way after a week of using a grimy sponge—my skin was not happy.
Cleaning and Maintaining Your Sponge
Speaking of clean sponges, let’s talk upkeep. A well-maintained sponge lasts longer and keeps your skin happy. Here’s how to do it right.
Why It Matters
Dirty sponges aren’t just icky—they can clog pores and ruin your makeup. Regular cleaning knocks out bacteria and keeps the texture soft and bouncy.
How to Clean Your Sponge
- Rinse It: Hold it under warm water to loosen makeup.
- Soap It Up: Use a gentle cleanser (baby shampoo works too) and massage it in.
- Rinse Again: Keep going until the water runs clear—no leftover foundation allowed.
- Dry It: Squeeze out excess water and let it air dry somewhere ventilated. Avoid tossing it in a drawer while damp—mold’s not cute.
Do this weekly, and replace your sponge every three months or so. If it starts crumbling or smelling funky, it’s time for a new one.
Product Recommendations
Ready to snag your own sponge and start blending? I’ve rounded up some top-rated picks you can grab on Amazon. These are crowd-pleasers that’ll help you nail that flawless look.
- Beautyblender Original
The OG of makeup sponges—soft, bouncy, and perfect for any liquid or cream. Users rave about its flawless finish. - Real Techniques Miracle Complexion Sponge
A budget-friendly gem with a flat edge for contouring and a rounded side for blending. It’s a steal for the quality! - EcoTools Perfecting Blender Duo
Two eco-friendly sponges—one for light coverage, one for heavier looks. Sustainable and effective? Yes, please.
These links are your ticket to flawless skin—click through and treat yourself. Your makeup bag deserves it!
Conclusion
So, there you have it—your ultimate guide to sponge blending! We’ve covered what it is, how to pick the right sponge, and the tricks to blending like a pro. Plus, you’ve got the lowdown on avoiding mistakes and keeping your sponge in tip-top shape. With a little practice and the right tools, that airbrushed, flawless skin you’ve been dreaming of is totally within reach.
Frequently Asked Questions About Sponge Blending
Got questions? I’ve got answers. Here’s the scoop on some common sponge blending curiosities.
How often should I replace my makeup sponge?
Every three months is the sweet spot, but if it’s falling apart or smells off, swap it sooner.
Can I use a sponge for powder products?
Totally! It’s best for liquids and creams, but a dry sponge can dab on powder in a pinch. Brushes might still edge it out here, though.
What’s the best way to clean a makeup sponge?
Warm water, a gentle cleanser, and a good rinse. Massage it in, rinse till clear, and air dry. Easy peasy.
Beauty blender vs. regular sponge—what’s the difference?
Beauty blenders are softer, more versatile, and designed for blending. Regular sponges (like wedges) are firmer and better for precision but less bouncy.
